Washable Bowl Covers

1. Supplies needed are PUL fabric, FOE, thread, and 2 circle items to use as pattern. I chose 2 different sized circles so I could make my bowl covers in a few different sizes.

2. Trace your circle onto your PUL. Cut 2 layers per bowl cover.

3. Now is the time to embroidery a design on the top side of PUL if you wish to do so.

4. Next I do a basic zigzag to casually attach my 2 sides together. You don't have to do this. However I find it much easier when attaching FOE. It's an extra step, but for me it keeps the project much more relaxed by doing this extra step.

5. When I am done zig zagging I trim off the extra bits around the edge. I trim close to the zigzag. This assures that my zig zagging will not stick out past my FOE.


6. Now you are ready to attached the FOE. FOE is a creased/folded elastic. It is great as you can finish an edge and gather with it all at the same time. It does have a sight learning curve to it if you have never used it before. I start attaching my FOE at the center bottom of the cover. I use a 3 step zigzag stitch for attaching FOE. I like it to be narrow and long. This is a personal preference and you can experiment to see the setting you most prefer for your own work.
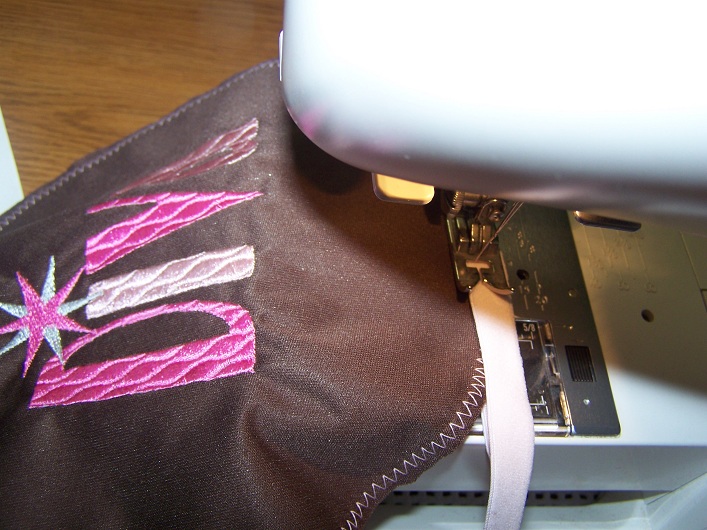
7. If your machine has a setting for needle stop up or down. Be sure to set it for needle stop down. This was as you stop to gather the FOE your project remains anchored in the machine.

8. As you stitch around the PUL you will keep your edge tucked into the folded FOE. You will gently pull your FOE so that you are creating a gather with the elastic. You will do this in small sections so that you can stay on the curve, keep an even pull etc. Again, this is why you should stop with the needle in a down position.

9. There are numerous ways and methods to finishing FOE. This is the method I prefer to use.


This leaves a "tail" that you fold to the back side. Do a gentle angled fold to keep the edge smooth. If you fold it sharply you are going to get a bump or a point. You are "following the curve.
Next you will stitch a straight stitch in the crease on the front side. You do this just in the area where the tail lays on the backside so that you are catching the tail in this stitching.


Trim the tail off close to the straight stitching and if you wish you can seal the raw foe edge with Fray Check.
And you are done... It's that easy!
